Introduction
GuardWare PROTECT encrypts and secures all types of files, including MS Office documents, PDFs, images, videos, and AutoCAD files, ensuring they remain protected from unauthorised use and theft, whether stored locally or shared externally via USB, cloud drives, email, or other methods.
As an end user, you interact with GuardWare PROTECT Client through the Windows Explorer right-click menu. From there, you can protect sensitive files by setting classifications, restricting access to specific Security Groups, limiting file circulation, adding an expiry date, and so on.
This guide provides step-by-step instructions for installing, configuring, and uninstalling GuardWare PROTECT Client on your PC. It includes system prerequisites, installation instructions, post-installation setup, and uninstallation instructions.
Prerequisites
Before proceeding, make sure the following requirements are met to avoid installation errors and ensure GuardWare PROTECT functions properly on your PC.
|
Specifications |
Minimum Requirements |
|
Operating System |
Windows 10 or later with all the latest updates installed |
|
Processor |
Intel i5, 4 cores |
|
RAM |
8 GB |
|
Free Disk Space |
5 GB |
|
Tools |
|
Whitelist GuardWare PROTECT
To ensure smooth installation and operation of the GuardWare PROTECT client, make sure it is whitelisted in your network’s firewall and antivirus software.
The GuardWare PROTECT installer deploys several components, including file system drivers, background services, and local daemons. These may be incorrectly flagged or blocked by AV, EDR, or XDR solutions. To avoid this, add the PROTECT services to your security software’s whitelist or trusted applications list.
You can either whitelist the entire installation directory:
C:\Program Files\Guardware\PROTECT
C:\ProgramData\Guardware
Or whitelist the following executable files individually:
|
SN |
Executable Name |
Executable Path |
|---|---|---|
|
1 |
AZLogin.exe |
|
|
2 |
decryptor.exe |
|
|
3 |
Fe2Policy.exe |
|
|
4 |
GWDirectoryMonitor.exe |
|
|
5 |
GWProtectEncrypt.exe |
|
|
6 |
GWProtectPolicy.exe |
|
|
7 |
SampCheckEncryption.exe |
|
|
8 |
SampCrypt.exe |
|
|
9 |
SampDir.exe |
|
|
10 |
SampUpdateHeader.exe |
|
|
11 |
WebView2DialogHost.exe |
|
|
12 |
auth.exe |
|
|
13 |
mip.exe |
|
|
14 |
pdfattach.exe |
|
|
15 |
pdfdetach.exe |
|
|
16 |
pdffonts.exe |
|
|
17 |
pdfimages.exe |
|
|
18 |
pdfinfo.exe |
|
|
19 |
pdfseparate.exe |
|
|
20 |
pdftocairo.exe |
|
|
21 |
pdftohtml.exe |
|
|
22 |
pdftoppm.exe |
|
|
23 |
pdftops.exe |
|
|
24 |
pdftotext.exe |
|
|
25 |
pdfunite.exe |
|
|
26 |
zstd.exe |
|
|
27 |
GWIconOverlayFix.exe |
|
|
28 |
GWProtectClient.exe |
|
|
29 |
GWProtectDesktop.exe |
|
Azure AD Users
For users registered with Azure AD, proceed directly to the Install GuardWare PROTECT Client section.
Local AD and External Users (On-Premises and Outside the Organisation)
If your users are registered with on-premises Active Directory (local AD), please follow the Pre-installation steps. This also applies to users who are outside your organisation, such as partners, contractors, or clients, who are not part of your organisation’s Azure AD or Local AD.
Pre-Installation Setup
Local AD users and external users need an invitation from GuardWare Australia to use GuardWare PROTECT. Once you receive an invitation, follow these steps:
-
Accept the invitation sent to your email.
-
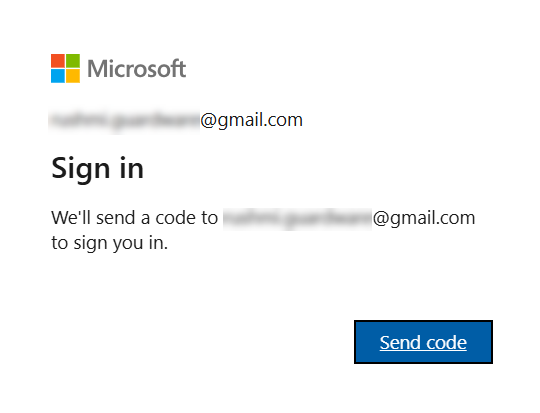
After accepting, you’ll be prompted to send a code to your email. Click Send code.
-
Enter the code sent to your email and sign in.
-
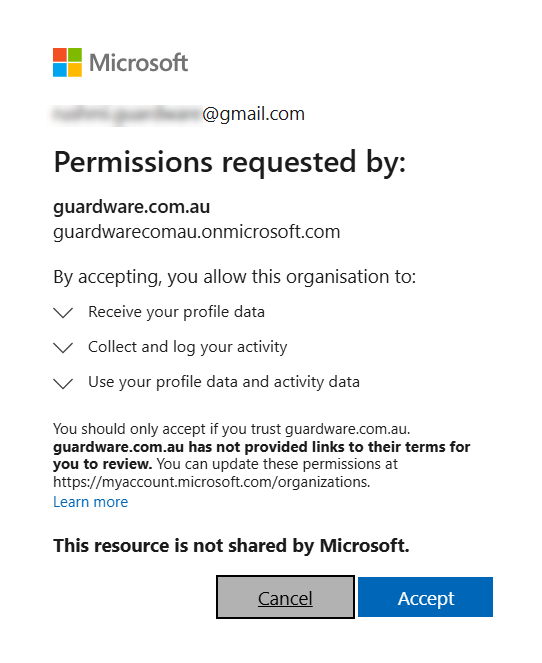
GuardWare requests certain permissions. Read the requested permission and accept. You’ll then be directed to the Welcome page, where you can see details on how to get started.
Install GuardWare PROTECT Client
-
Double-click the GuardWare PROTECT installer file to begin the installation.
-
In the Setup Wizard, click Next to continue.

-
Read and accept the End User Licence Agreement (EULA) and click Next.

-
Choose the folder where you want to install GuardWare PROTECT and click Next. By default, PROTECT will be installed in:
C:\Program Files\. -
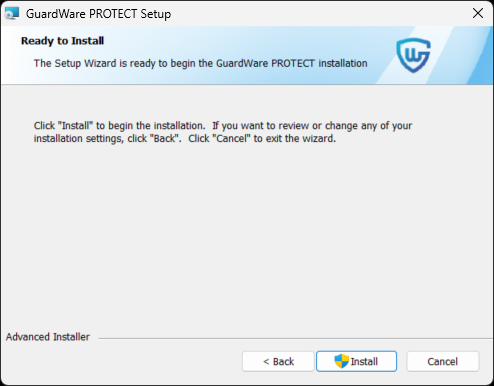
Click Install. The installation may take a few minutes to complete.
-
If you do not have Microsoft Azure CLI installed, a Setup Wizard will prompt you to install it. Read and agree to the licence agreement terms and click Install.
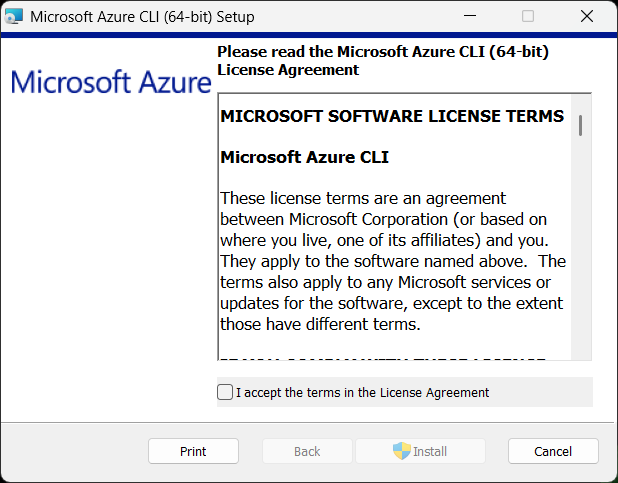
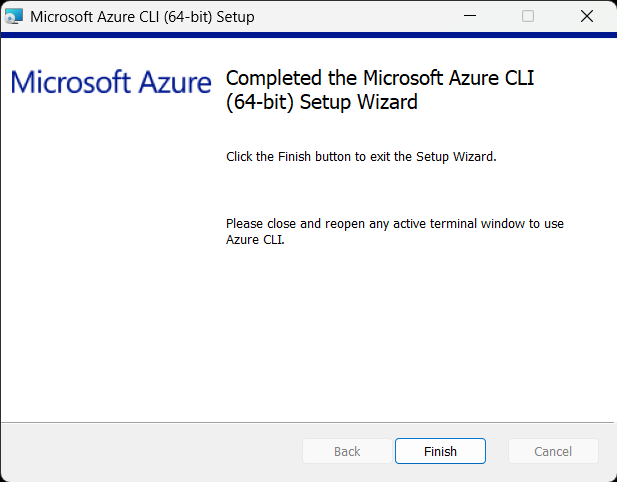
Once the installation is complete, click Finish to exit the Microsoft Azure CLI Setup Wizard and continue with the PROTECT Client installation.
During installation, a User Account Control (UAC) dialog box may appear. This is a standard Windows security feature that verifies whether you want to allow the installer to make changes to your computer. When this dialog appears:-
Verify that the publisher is GuardWare Australia Pty Ltd.
-
Click Yes to allow the installation to proceed. Clicking No cancels the installation.
-
-
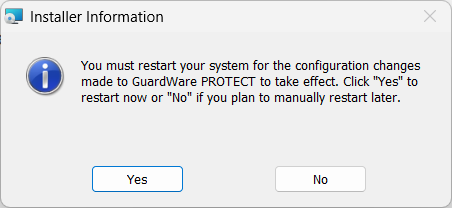
Once the PROTECT Client installation is complete, click Finish to exit the wizard. You’ll be prompted to restart your PC. Click Yes. After restarting your PC, follow the steps in Post-Installation Setup.
Restarting is mandatory for GuardWare PROTECT to install successfully.
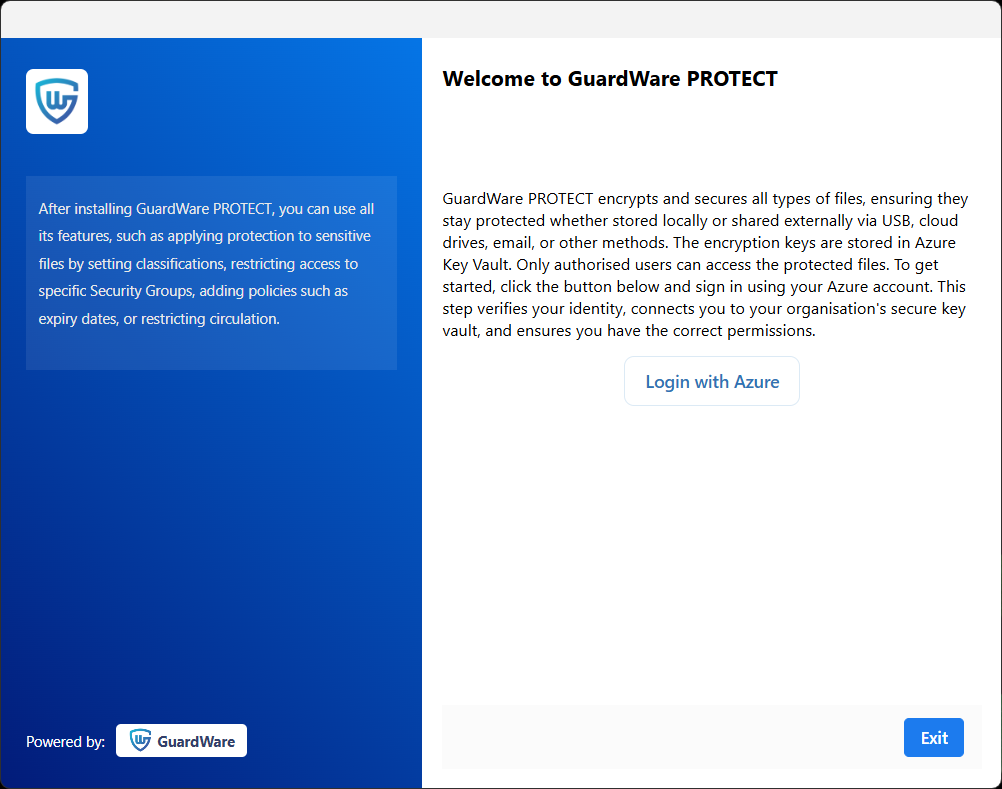
Post-Installation Setup
After restarting your PC, a Welcome Wizard appears automatically. If you do not see it right away, please wait a few minutes.
-
In the Welcome wizard, click Login with Azure.
-
For Azure AD users:
-
Select your work email address and click Continue.
-
Select your Tenant ID and Subscription and click Submit.
-
Tenant ID: The unique identifier of your Azure AD.
-
Subscription: Defines the set of resources and the billing account.
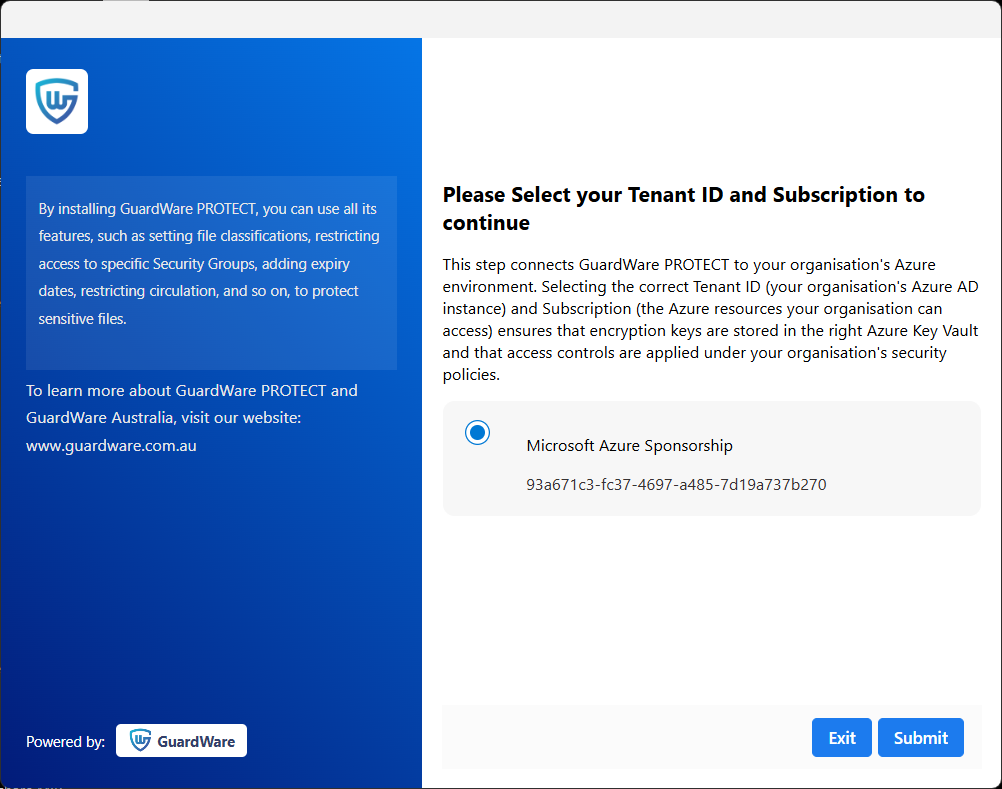
Select the Subscription that contains your Key Vault. If multiple appear, select the one where the Key Vault and Service Principal for GuardWare PROTECT are set up. If you’re not certain which subscription applies, you can verify it in the Azure Portal under Subscription or contact your administrator.

-
-
Click Exit when the setup is complete.
-
-
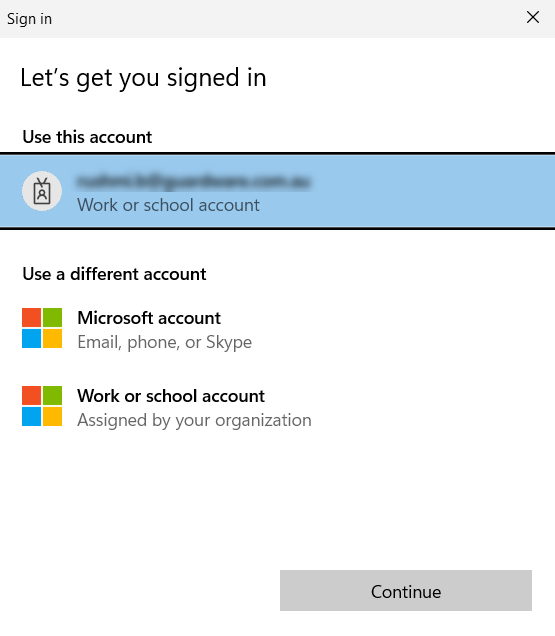
For external users:
-
Select Work or school account.
-
Enter the email address where you received the invitation, and click Next.
-
Check your email for a verification code, then enter the code and click Sign in.
-
When prompted to sign in automatically across desktop apps and browsers, select
No, this app only(for better security). This ensures your Azure login is used only within GuardWare PROTECT, preventing other apps or browsers on the same device from automatically accessing your credentials. You can always sign in separately to other apps when needed. -
Click Exit when the setup is complete.
-
✅ You can now use GuardWare PROTECT to add protection to sensitive files, set classifications, restrict access to Security Groups, add expiry dates, restrict circulation, and so on.
Uninstall GuardWare PROTECT Client
To remove GuardWare PROTECT from your PC:
-
Double-click the PROTECT installer file.
-
In the Setup Wizard, click Next to continue.

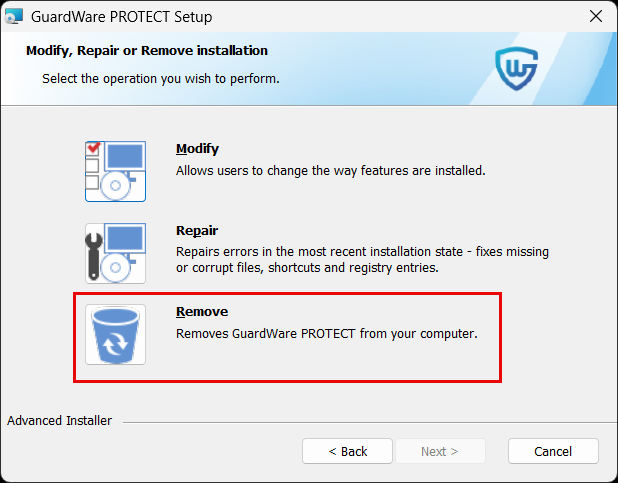
-
You’ll get options to modify, repair, or remove PROTECT. Choose Remove, then click Remove to uninstall GuardWare PROTECT.

-
(Optional) To review or change installation settings, click Back. To exit without uninstalling, click Cancel.
-
During the uninstallation, you may see the following dialogs:
-
Installer Information

-
When the Installer Information appears, click OK to continue with the uninstallation.
-
-
User Account Control (UAC)
This is a standard Windows security feature that verifies whether you want to allow the installer to make changes to your computer. When this dialog appears:-
Verify that the publisher is displayed as GuardWare Australia Pty Ltd.
-
Click Yes to allow the uninstallation to proceed. If you select No, the uninstallation will be cancelled.
-
-
-
After uninstallation is complete, you will be prompted to restart your PC. Click Yes.
Restarting is mandatory for GuardWare PROTECT to fully uninstall.