Microsoft 365/Cloud Monitor Setup
GuardWare INSIGHT integrates directly with Microsoft 365 cloud services, specifically Exchange Online and SharePoint Online, to monitor and analyse cloud-based activities. To enable this integration, several configurations must be completed in the Azure portal. Because the registration process relies on your organisation’s Azure configuration and credentials, it must be performed using the company’s Azure portal account by an authorised administrator.
The configurations involve registering an application in Azure, creating a certificate, and granting the required permissions and roles, which are explained below. These steps allow GuardWare INSIGHT to securely access monitoring data from Exchange and SharePoint. Once the configuration is complete, the generated information, such as application ID, certificates, and domain details, must be sent to GuardWare Support to complete the setup. See Information to Be Sent to GuardWare for the full list.
|
Requirement |
Description |
|---|---|
|
Application (Client) ID |
Identifies the GuardWare M365 Monitor Azure application. This ID is generated automatically when registering the application in Azure. |
|
Directory (Tenant) ID |
Identifies your organisation in Azure for email monitoring. This ID is also generated during Azure application registration. |
|
Organisation Primary Domain |
Identifies your organisation for SharePoint monitoring. This is your organisation’s primary .onmicrosoft.com domain. |
|
Application Permissions |
The following permissions are required in Azure for GuardWare Cloud Monitor to access Microsoft 365 data:
|
|
M365 Security Group |
Created in the Microsoft 365 Admin Center, this group defines the users whose emails are to be monitored. |
|
On-Premises Domain Name |
Maps GuardWare INSIGHT endpoint users to their corresponding Microsoft 365 email addresses within the GuardWare Server. |
|
Certificate and Password |
Used for secure communication between Microsoft 365 and GuardWare Cloud Monitor. The certificate is generated locally using Microsoft PowerShell. |
Register an Application on Azure Portal
To enable GuardWare INSIGHT to access and monitor Microsoft 365 data, you must first register a new application in the Azure portal. This application acts as a secure bridge between Microsoft 365 and GuardWare, allowing authorised access through assigned permissions and roles.
To register an application on Azure Portal:
-
Go to the Azure Portal and sign in with your Microsoft 365 administrator account.
-
Navigate to Microsoft Entra ID.

-
Click +Add, and select App registration.

-
Configure:
-
Name: Enter a user-facing descriptive display name (e.g.,
GuardWare M365 Monitor). -
Supported account types: Select Accounts in this organizational directory only (Single tenant).
-
Redirect URI: Leave empty for service-to-service authentication.

-
-
Click Register.
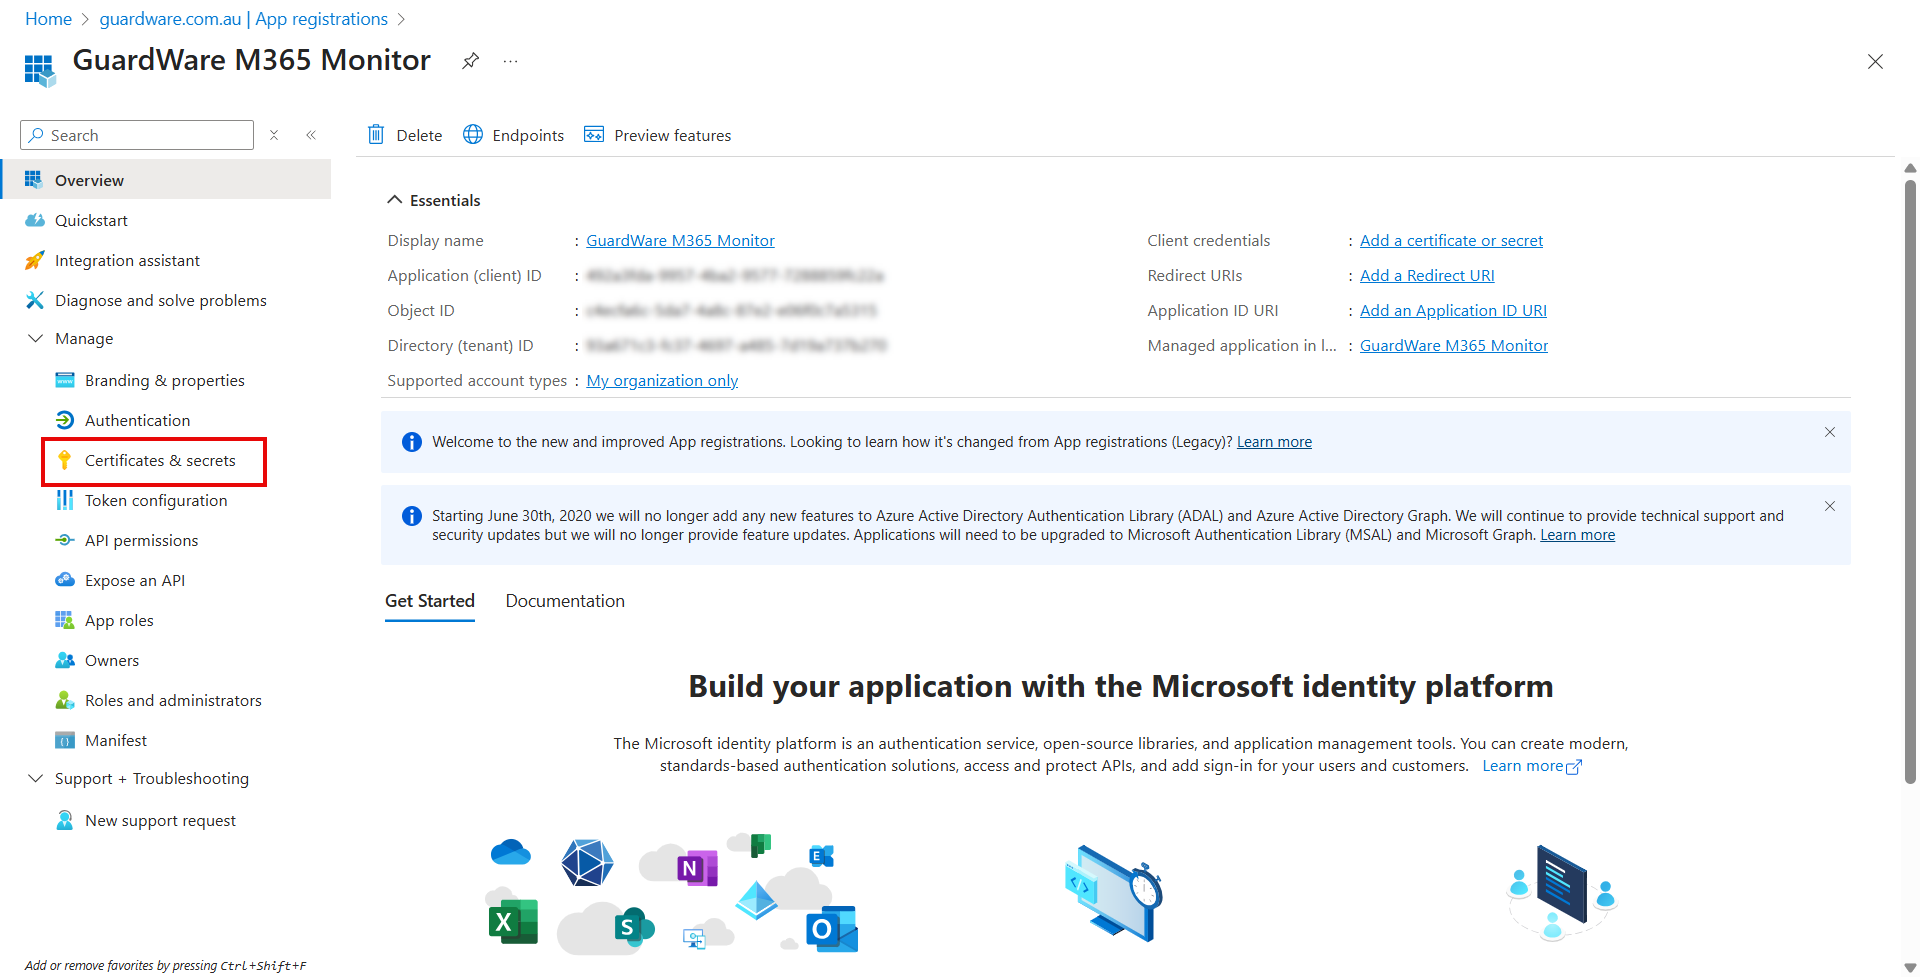
After registration is complete, you will get the Application (client) ID and Directory (tenant) ID in the Overview page. Copy and store them in a secure place. You’ll need it later to complete the setup.

Create a Self-Signed Certificate
You can create a self-signed certificate using Windows PowerShell with the following script to establish a secure connection between GuardWare INSIGHT and Microsoft 365. The certificate remains valid for three years.
Before running the script:
-
Replace
<companydomain>and<password>with your own values. -
The company domain is used as a descriptor and does not need to be accurate.
-
Copy and store the password securely. You’ll need it later to complete the setup.
-
The script generates two files:
-
A .cer file: Used to register the certificate with the Azure application.
-
A .pfx file: Used by
GWCloudMonitor.exeto identify itself to Azure.
-
-
Both
.cerand.pfxare saved inC:\Temp(you can change the path as needed).
PowerShell Script
# Create certificate
$mycert = New-SelfSignedCertificate -DnsName "<companydomain>" -CertStoreLocation "cert:\CurrentUser\My" -NotAfter (Get-Date).AddYears(3) -KeySpec KeyExchange

# Export certificate to .pfx file
$mycert | Export-PfxCertificate -FilePath mycert.pfx -Password (ConvertTo-SecureString -String "<password>" -AsPlainText -Force)

# Export certificate to .cer file
$mycert | Export-Certificate -FilePath mycert.cer
Register the Self-Signed Certificate
The next step is to upload the certificate to the Azure application.
-
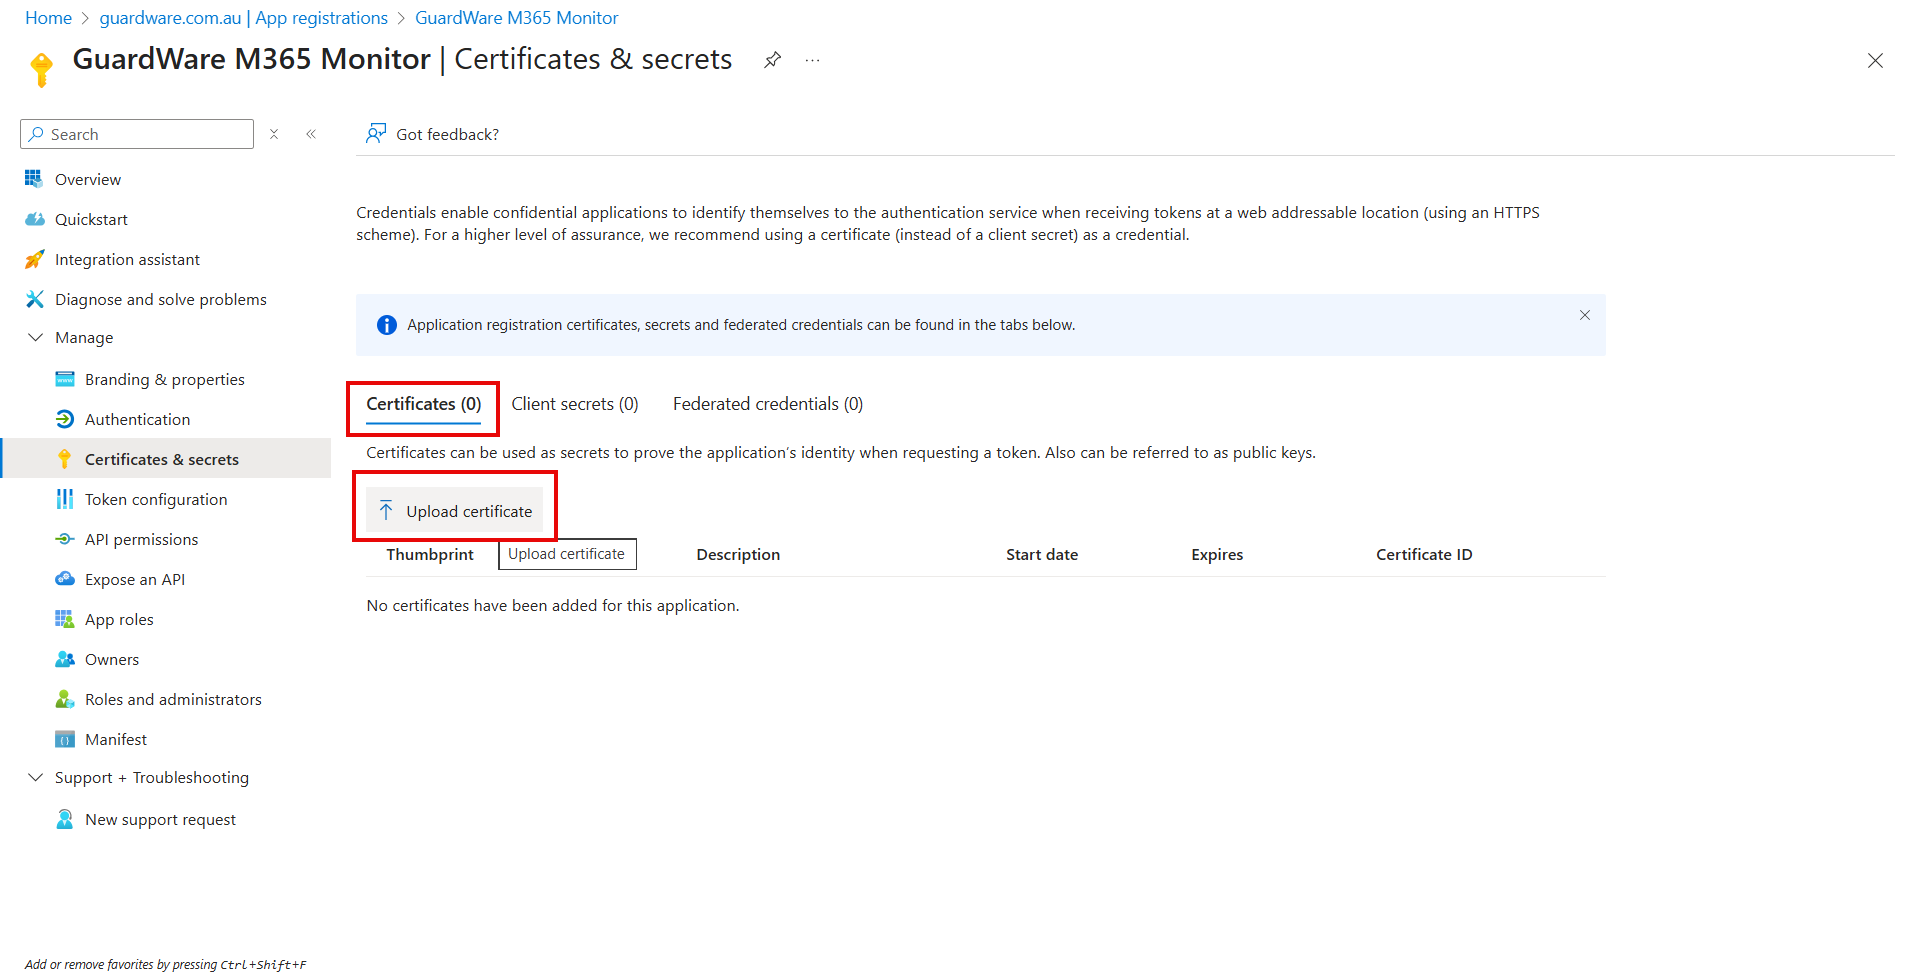
In the left navigation menu of the GuardWare M365 Monitor application page, click Certificates & secrets.
-
Under Certificates, click Upload certificate.
-
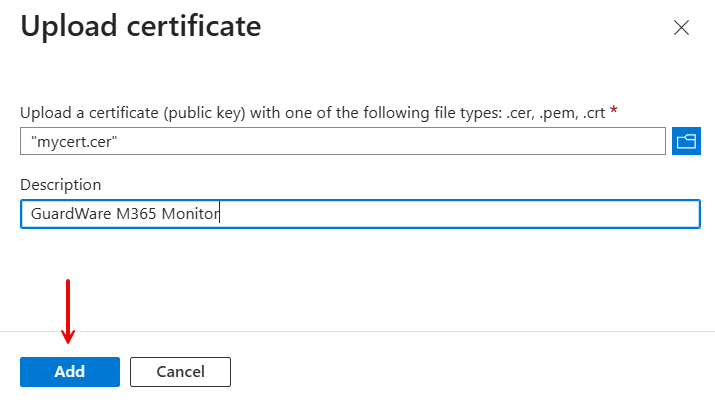
Select the
mycert.cerfile to upload and enter a description. -
Click Add.
Once successfully uploaded, the certificate will appear in the list of certificates associated with the application.
Grant Permissions to the Application
Microsoft Graph API permissions and Exchange Online API permissions are needed for GuardWare INSIGHT to access user, group, and mailbox information for monitoring and analysis.
Grant Microsoft Graph API Permissions
To grant Microsoft Graph API Permissions:
-
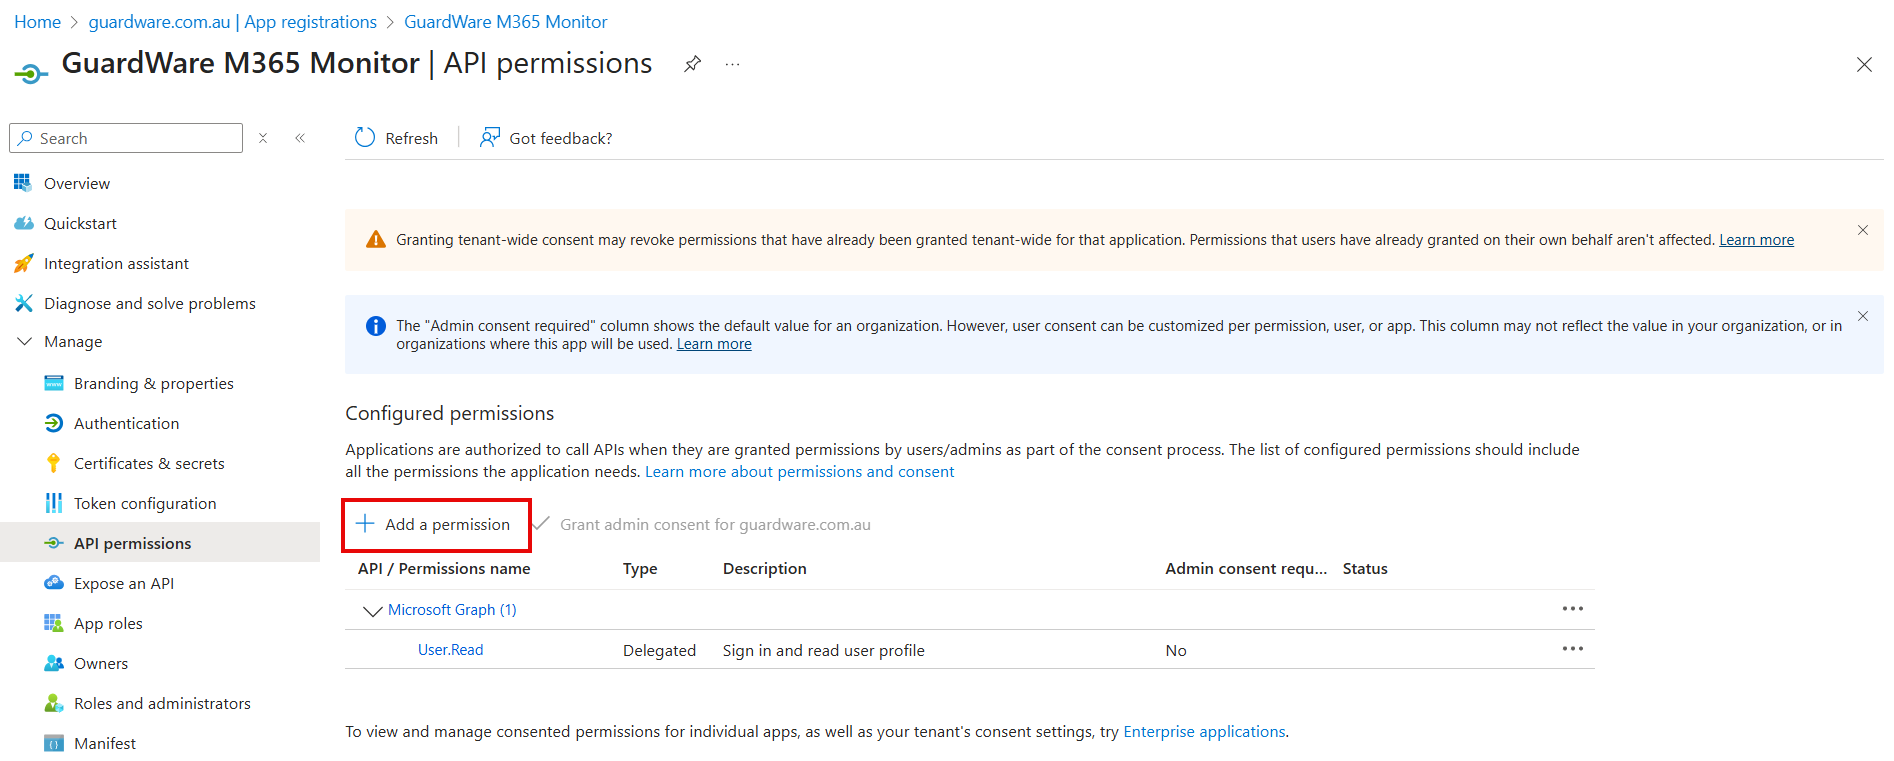
In the left navigation menu of the GuardWare M365 Monitor page, click API Permissions.

-
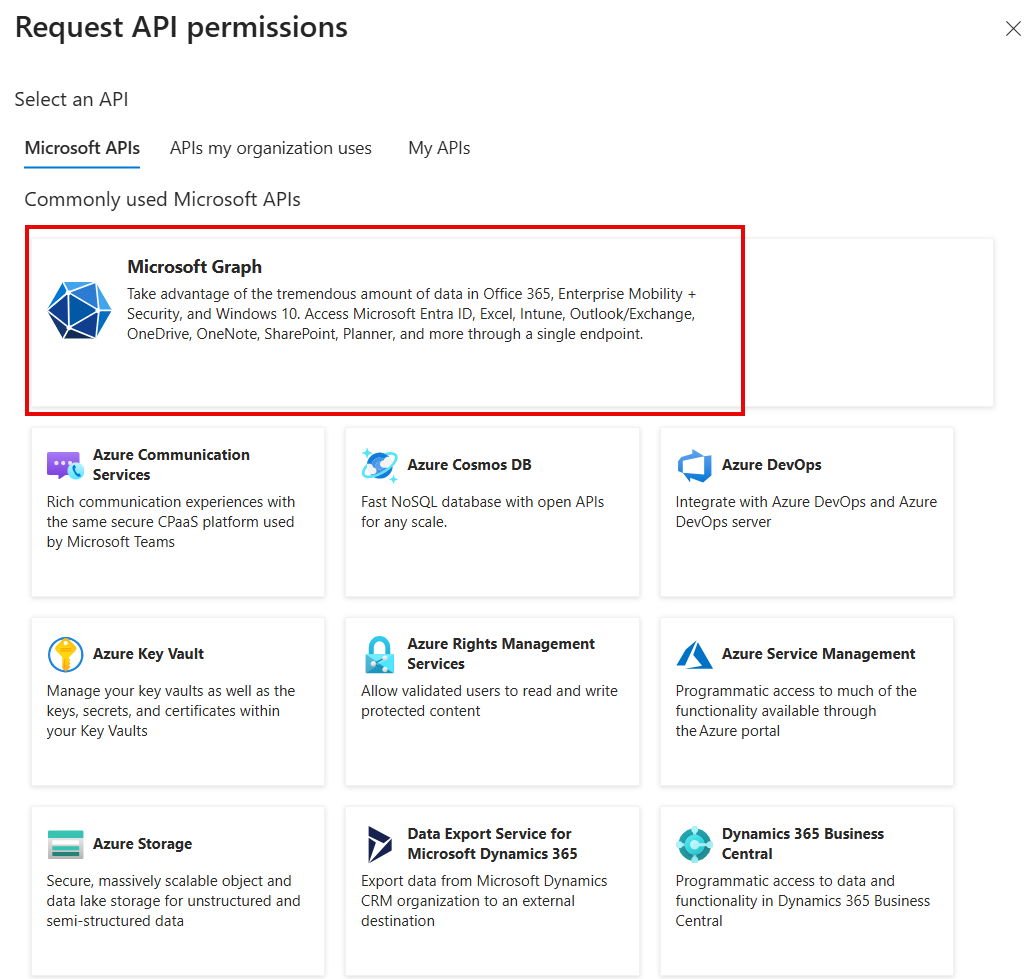
Click + Add a permission. The Request API permissions panel opens on the right-hand side.
-
Under the Microsoft APIs tab, click Microsoft Graph.
-
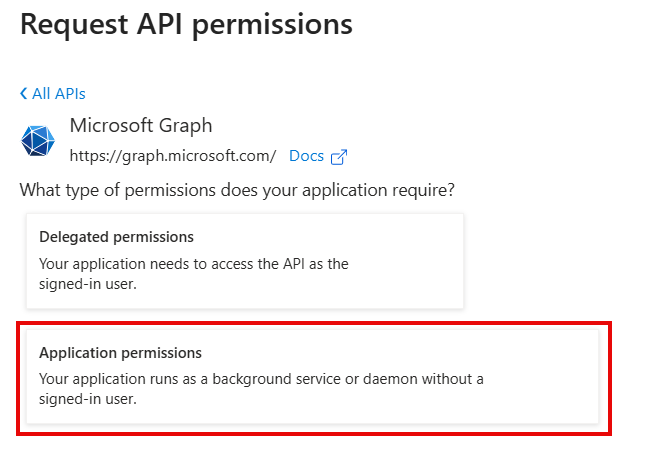
Click Application permissions.
-
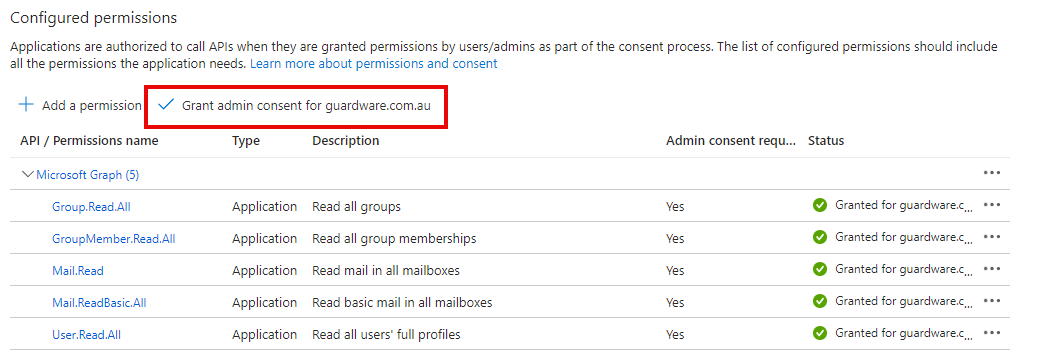
From the list of permissions, expand the categories or search and select the following permissions:
-
Group.Read.All -
GroupMember.Read.All -
User.Read.All -
Mail.Read -
Mail.ReadBasic.All
-
-
Click Add permissions.
-
Once added, click Grant admin consent for <your organisation>.
Grant Exchange Online API Permission
To grant Exchange Online API permission:
-
In the API Permissions page, click + Add a permission. The Request API permissions panel opens on the right-hand side.
-
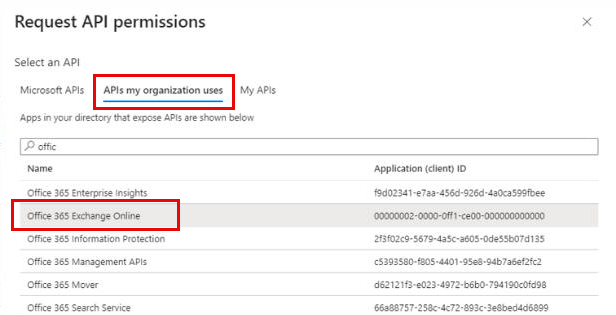
In the Request API permissions panel, select the APIs my organisation uses tab.
-
Search for Office 365 Exchange Online.
-
Click Office 365 Exchange Online from the search results to view its available permissions.
-
Under Exchange, select the
Exchange.ManageAsApppermission.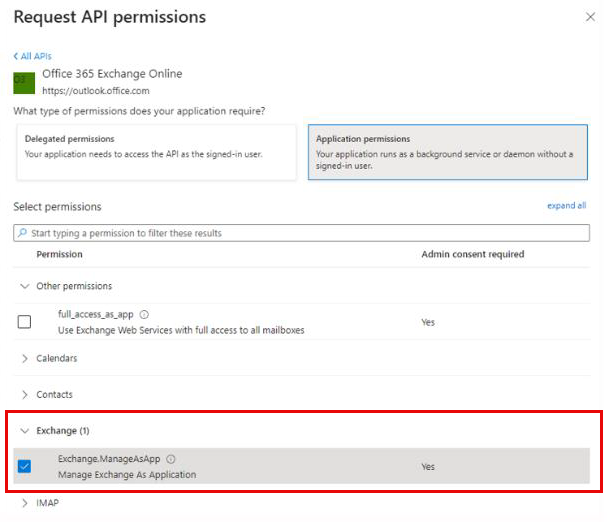
-
Click Add permissions to complete the process.
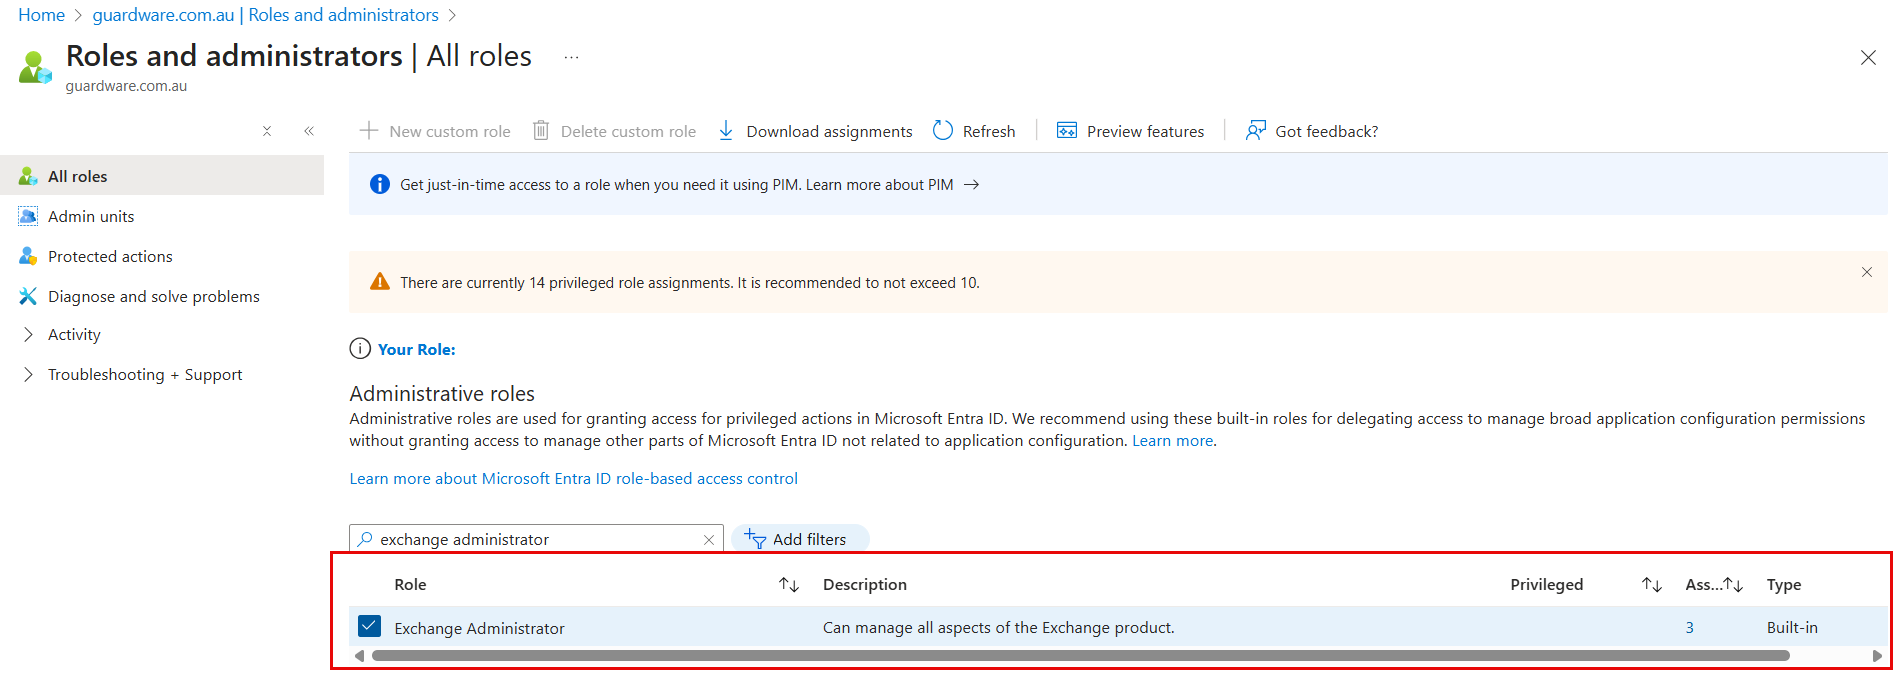
Assign Role to the Application
After configuring permissions, assign the necessary Microsoft Entra roles to the GuardWare M365 Monitor application. To ensure GuardWare INSIGHT can access the required Microsoft 365 data, specific administrative roles must be assigned to the registered application.
To assign roles to the application:
-
In the Azure portal, navigate to Microsoft Entra ID and click Roles and administrators or use the search bar to find and select Microsoft Entra Roles and Administrators.
-
To assign the Exchange Administrator Role:
-
On the All Roles page, search and select Exchange Administrator.
-
Click Add assignments.
-
In the search field, enter the name of the application created earlier (for example, GuardWare M365 Monitor).
-
Select the application and click Add to assign the role.
-
-
To assign the Compliance Administrator Role:
-
Return to the All Roles page and select Compliance Administrator.
-
Click Add assignments.
-
Search for the same application name (for example, GuardWare M365 Monitor).
-
Select the application and click Add to complete the role assignment.
-
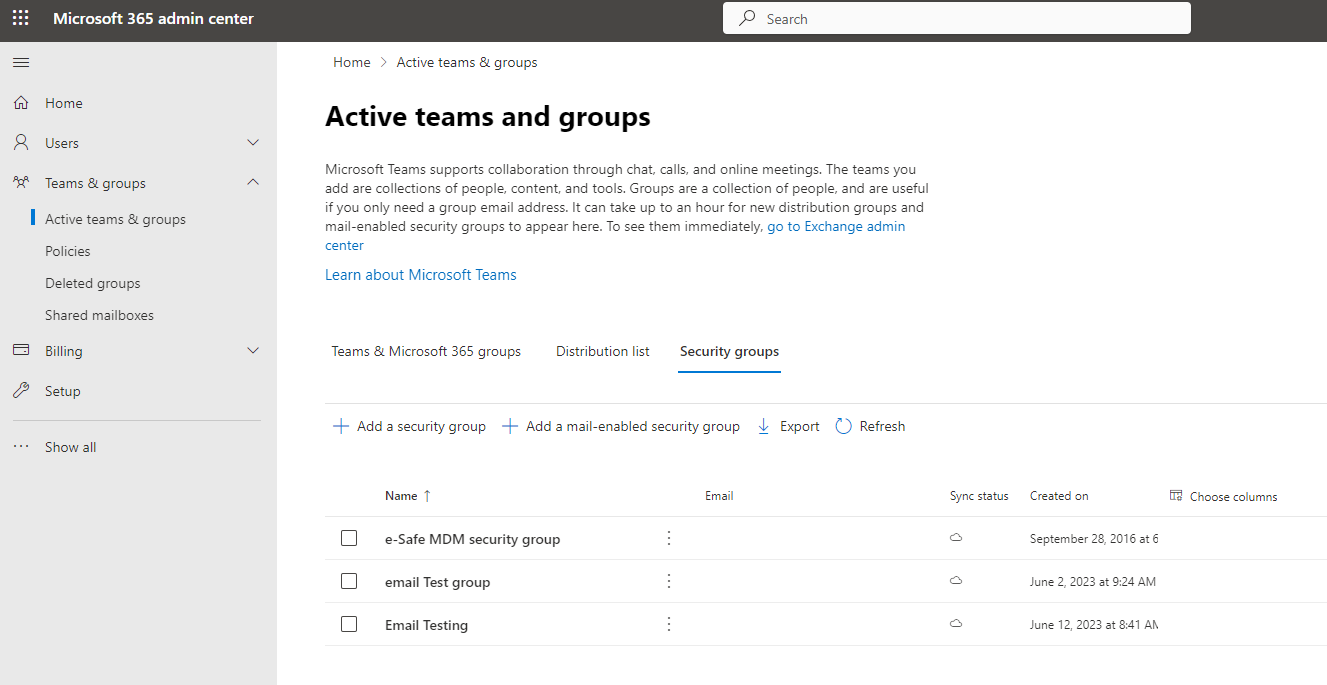
Create a Security Group of Emails to Be Monitored
A dedicated security group helps define which user mailboxes will be monitored by GuardWare INSIGHT.
To create a security group that includes the email accounts to be monitored:
-
Log in to the Microsoft 365 admin center as an administrator.
-
Navigate to Teams & Groups > Active Teams & Groups, and select the Security groups tab.
-
Click + Add a security group.
-
Enter the Name and Description for the security group and click Next.
-
Click Create group, and once the group is created, click Close. The new security group may take a few seconds to appear in the list.
-
Click the newly created security group to open it.
-
Click Members > View all and manage members > Add members.
-
Add the users (email accounts) you want to include in the monitored group.
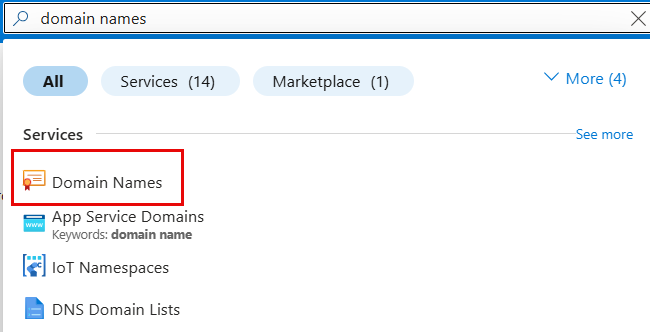
Getting the Organisation’s Primary Domain
The organisation’s primary domain is required for integration with GuardWare INSIGHT.
To find your organisation’s primary domain in Azure:
-
Log in to the Azure Portal.
-
Search for Domain names, and select Domain Names from the results.
-
Locate the domain that ends with
.onmicrosoft.com.
-
Copy the domain name; this is your organisation’s primary domain.
Information to Be Sent to GuardWare
After completing all configuration steps, send the following details to GuardWare Support to complete the Microsoft 365 setup:
-
Application (Client) ID
-
Directory (Tenant) ID
-
On-Premises Domain Name
-
Certificate (.pfx file) and its Password
-
Monitored Security Group
-
Organisation Primary Domain
Ensure that the certificate password is shared securely and only with authorised GuardWare representatives.