1. Introduction
GuardWare DISCOVER is a cross-platform data discovery and remediation system designed to locate, analyse, and manage sensitive data across target devices, file servers, email systems, and cloud storage. Its primary focus is PCI and PII data discovery with the ability to add other data types as required.
This guide introduces the essential steps for setting up the Management Console and quickly initiating scan jobs. A detailed guide is also available if you wish to understand each feature of the Management Console.
Before proceeding, ensure that you have completed the DISCOVER Server Installation and the GuardWare DISCOVER Agent Installation Guide. Which includes installing the GuardWare DISCOVER Agent and configuring remote access to connect to target systems and cloud services.
2. Create Data Classifications (Optional)
This step is only required if you need to include custom data types in the scan. This includes any data types that are not part of DISCOVER’s data type library and fall outside standard PCI DSS and PII categories. Otherwise, you can skip to Configure and Run Scans.
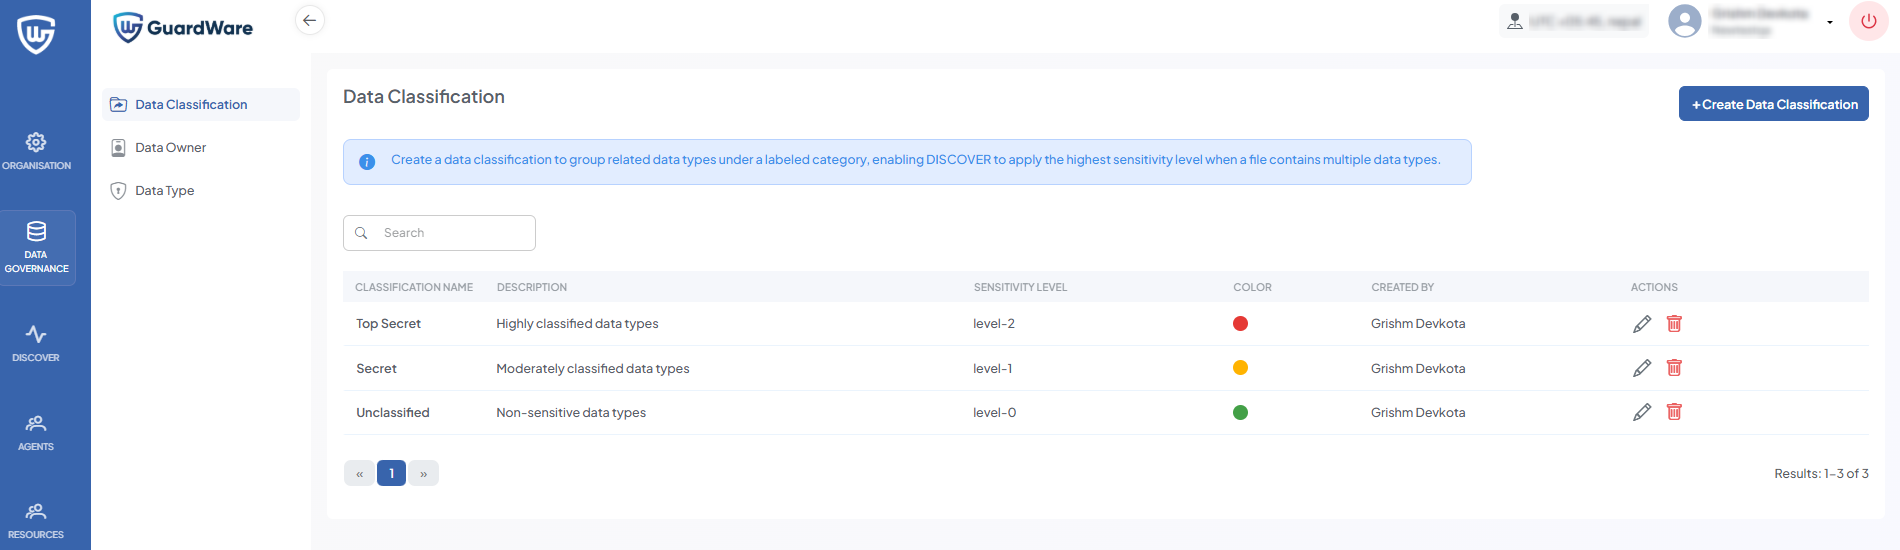
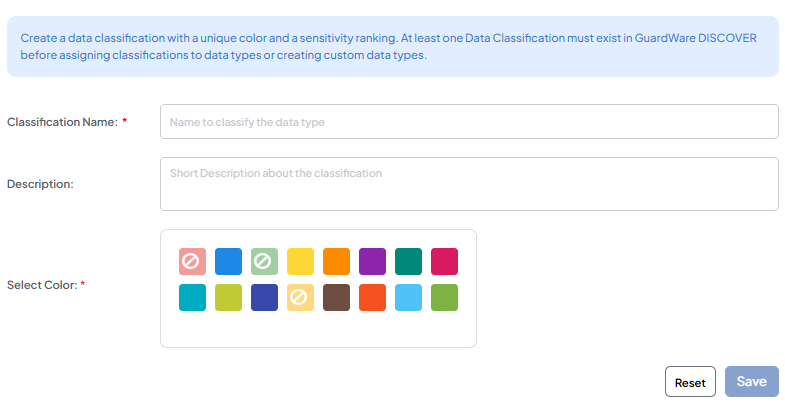
The Data Classification feature lets you group multiple data types under a single classification and assign a color label for easy visual identification. Classifications are automatically given a sensitivity level based on their creation order, starting from level 0 and increasing for each new entry.
When a document contains multiple classified data types, DISCOVER applies the highest sensitivity level detected, ensuring the file is classified according to its most sensitive content.
-
Log in to the GuardWare DISCOVER Management Console and navigate to DATA GOVERNANCE > Data Classification.
-
Click +Create New Classification.
-
Enter a Classification Name, Description (optional), and select a Color for visual identification.
-
Click Save.
3. Create a Data Owner
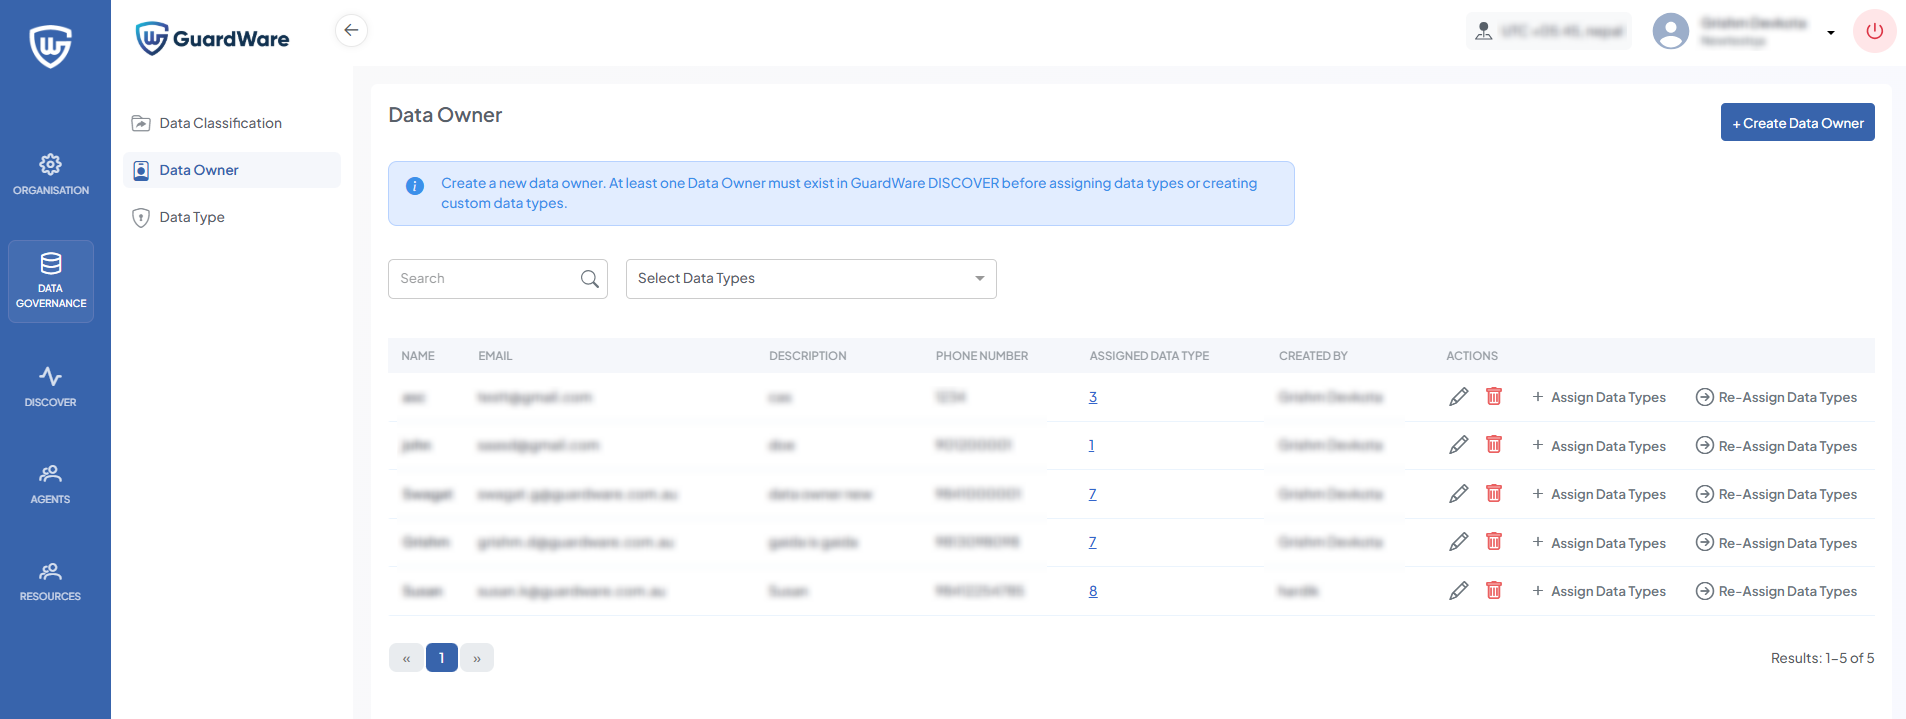
A data owner is a person who’s linked to one or more data types. They receive email alerts whenever sensitive data linked to them is discovered, ensuring accountability and timely notifications. The Data Owner does not have to be the same person as the device owner and can be a completely separate individual.
-
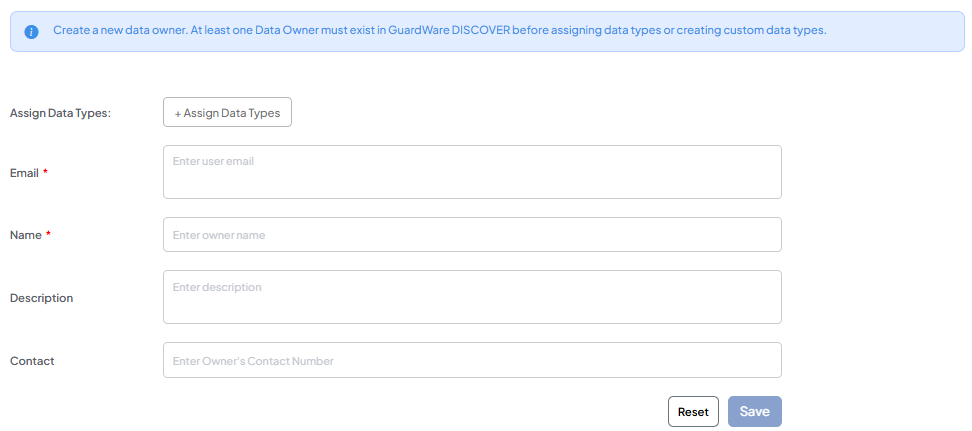
Go to DATA GOVERNANCE > Data Owner and click +Create Data Owner.
-
Enter the new data owner’s Email, Name, Phone number, Description (optional), and Contact (optional).
-
Click Save. To assign data types to data owners, see Assign Data Types.
4. Assign or Create Data Types
Data Types in DISCOVER define what kind of information the system looks for during scans. You can either assign predefined data types from the built-in library (PII, PCI DSS) or create and assign custom data types if your data isn’t covered in the predefined data type library.
Start with a few high-priority data types and expand gradually based on your needs.
Assign Data Types
-
Go to DATA GOVERNANCE > Data Owner.
-
Select the data owner you want to assign a data type to and click +Assign Data Types.
-
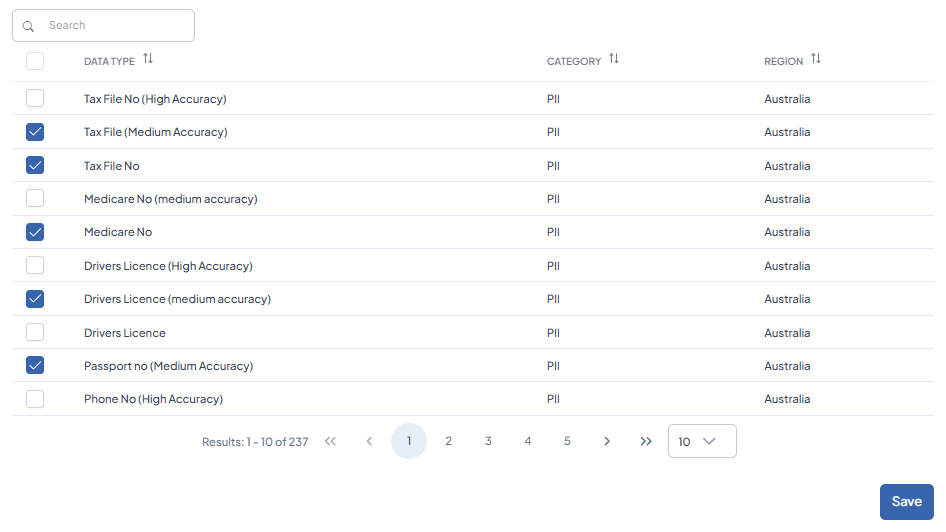
Use the search box to find the desired data type (e.g., MasterCard), select it, and click Save to assign it to the owner.
Create Data Types (Optional)
In addition to predefined data types, you can also create custom data types for DISCOVER to scan. A data owner must first be created when creating custom data types.
-
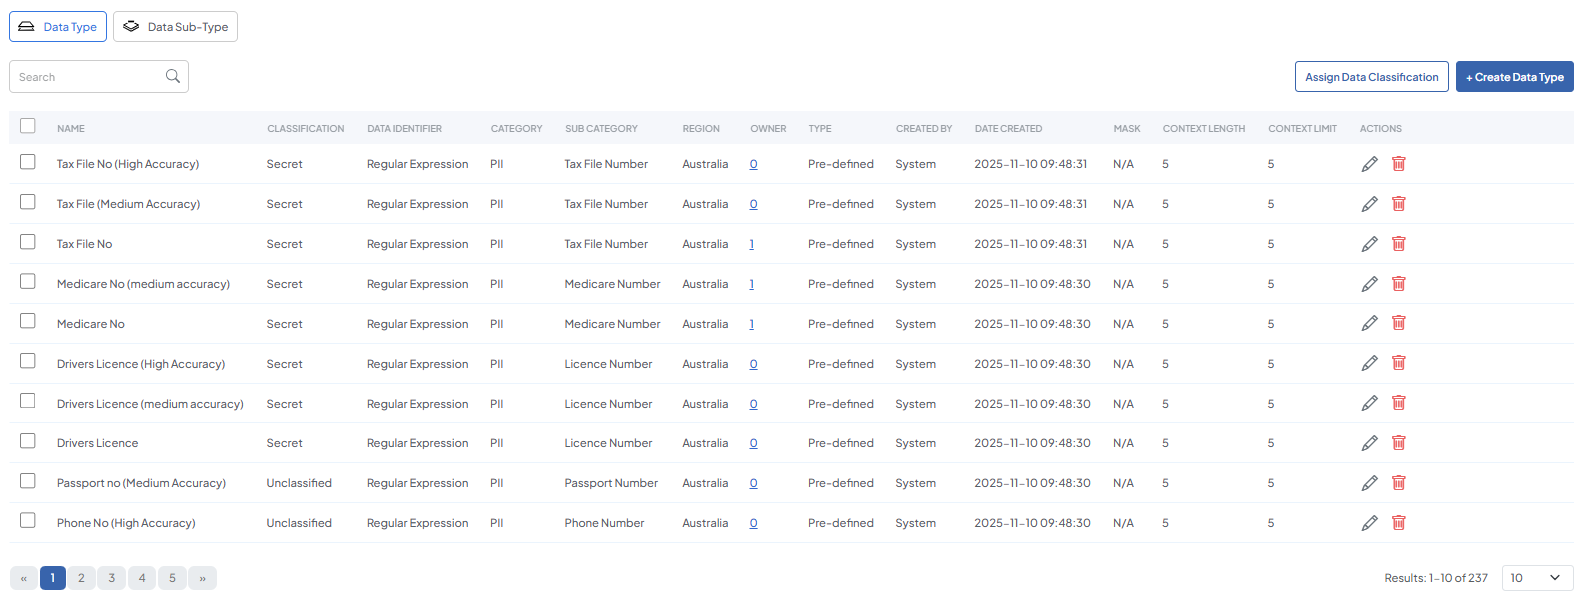
Go to DATA GOVERNANCE > Data Types and click +Create Data Type.
-
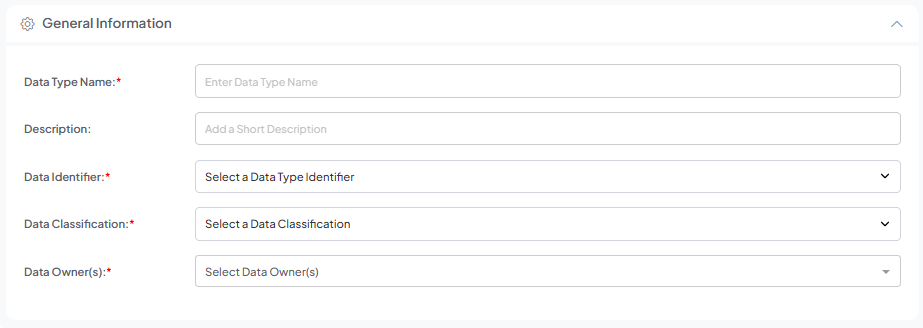
In General Information, enter the Data Type Name and Description (optional).
-
Select a Data Identifier from the dropdown. You can choose between three data type identifiers:
-
Regular Expressions (Regex): for structured patterns such as credit card numbers, Medicare numbers, and SSNs.
-
Sensitive Words: for keywords or phrases that do not follow regex or filename expression patterns. Example: “salary”, “John”, or “confidential.”
-
Filename Expressions: for matching files by name or extension (e.g.,
*.pdf).
-
-
Assign a Data Classification to the data and add Data Owner(s) to the newly created data type.
-
Click Save.
5. Add Devices and Services
Targets are the systems and services DISCOVER scans to detect sensitive data. This includes endpoint devices and file servers, as well as cloud services like Microsoft SharePoint and Exchange. Properly defining targets ensures scans reach the correct data sources.
Add Device Targets
-
Go to DISCOVER > Target Discovery > Devices and click +New Target Discovery.
-
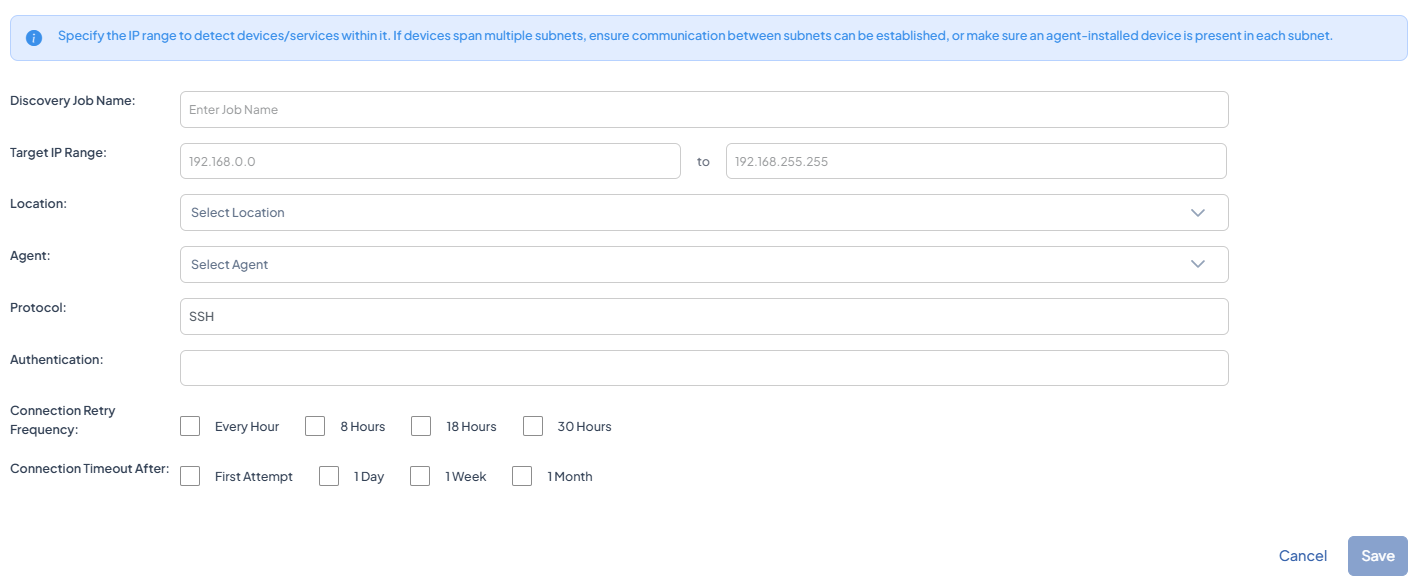
Enter a Job Name to name the scan, and specify the Target IP range to define the network segment in which DISCOVER should search for devices.
-
Set the Location to filter the list of agents by their assigned location.
-
Select the appropriate Protocol (WinRM, SSH, or FILE SERVER) to connect to the devices and provide Authentication credentials.
-
Set the Connection Attempt Interval to define how frequently DISCOVER will try to connect to a target.
-
Set Give-up Trying After to specify the maximum duration DISCOVER will continue attempting the connection before abandoning it.
-
Click Save.
Add Services
-
Go to Target Discovery > Services and click +New Target Discovery.

-
Enter the Discovery Job name, then select the Cloud Connector for the service type (Microsoft Exchange or SharePoint).
-
Specify the Organisation (for SharePoint) and provide the Client ID and Tenant ID for authentication.
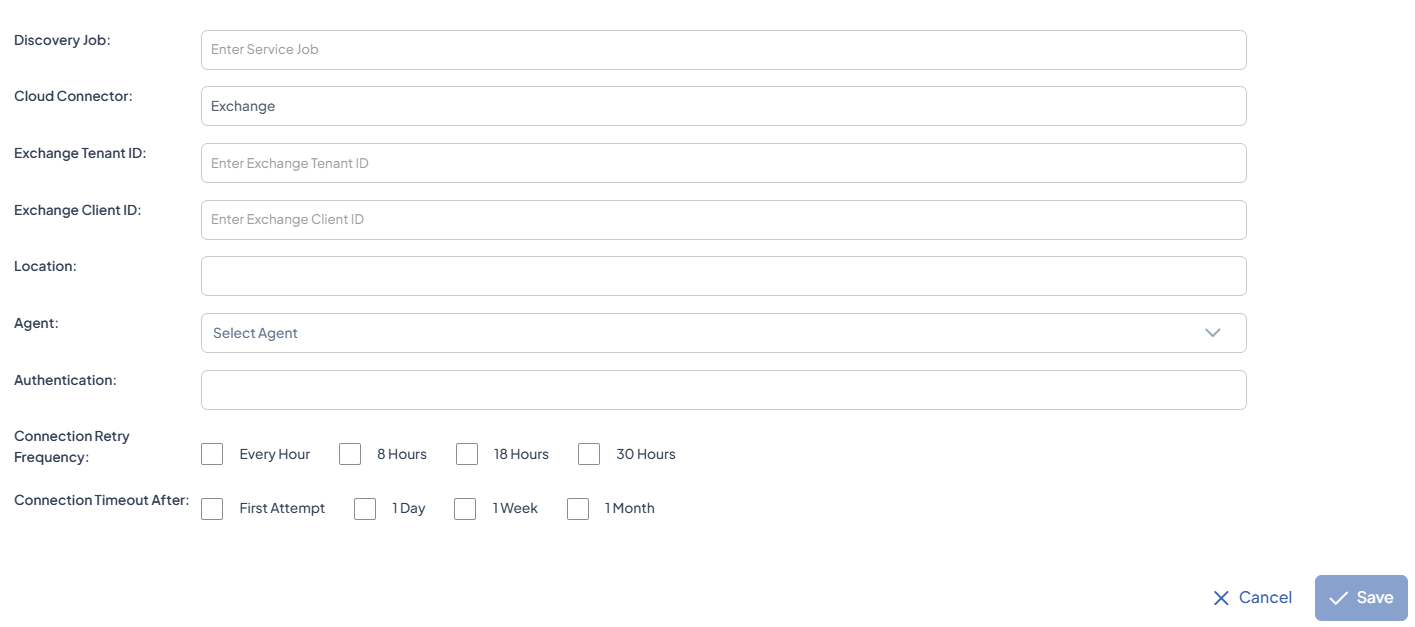
-
Set the Location to filter the list of agents by their assigned location.
-
Select either Client Exchange Secret or Certificate as an authentication method.
-
Set the Connection Attempt Interval to define how frequently DISCOVER will try to connect to a target.
-
Set Give-up Trying After to specify the maximum duration DISCOVER will continue attempting the connection before abandoning it.
-
Click Save.
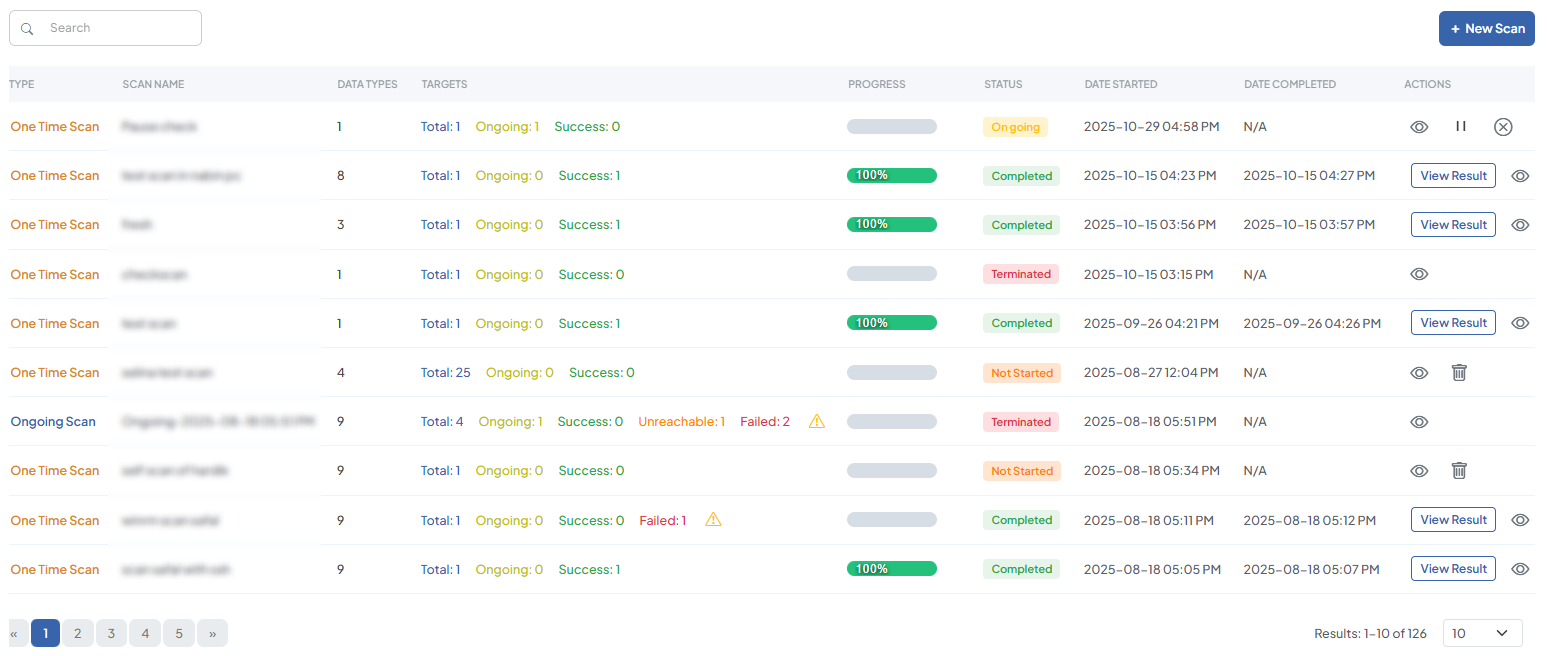
6. Configure and Run Scans
Once classifications, data owners, and data types are configured, DISCOVER is ready to perform scans. During a scan, DISCOVER examines the selected devices and services by checking the specified file paths (or all paths, if configured) and the specified file types (or all types).
It then searches within those files for the selected sensitive data types, identifying and reporting any matches it detects. You can run a One-Time Scan for testing or targeted scans, or an Ongoing Scan for complete routine monitoring.
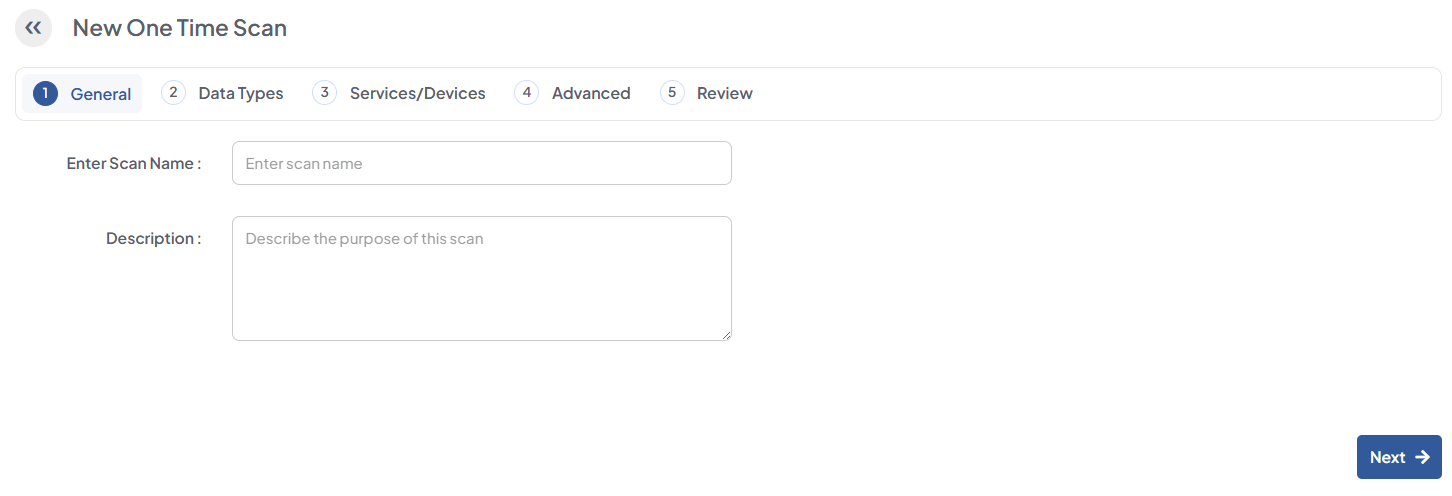
Configure and Run a One-Time Scan
A One-Time Scan checks new or changed files on the selected targets against your configured data types and classifications. Use it to validate a new rule, perform a targeted check, or test new scan configurations.
-
Navigate to DISCOVER > Scans and click +New Scan.
-
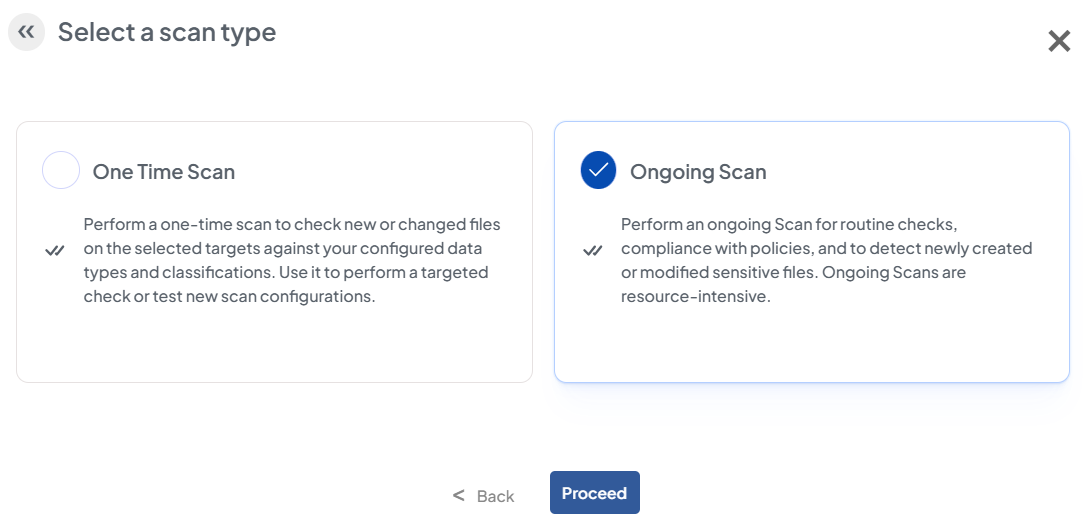
Select One-Time Scan and click Proceed.

-
Enter a Scan Name and give a Description (optional), then click Next.
-
Select the data types you want to search for and click Next.
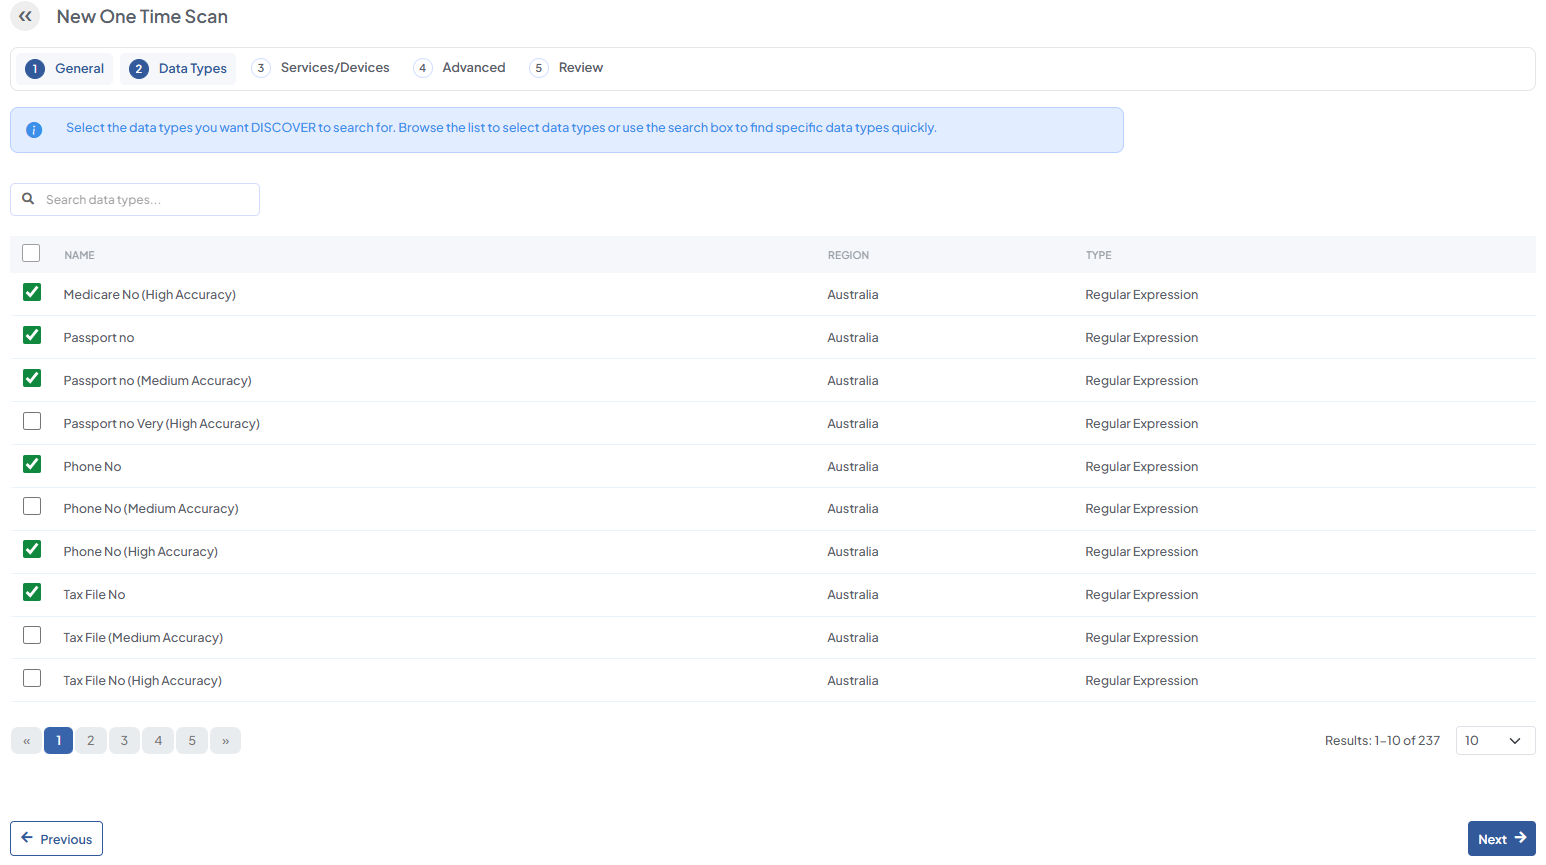
-
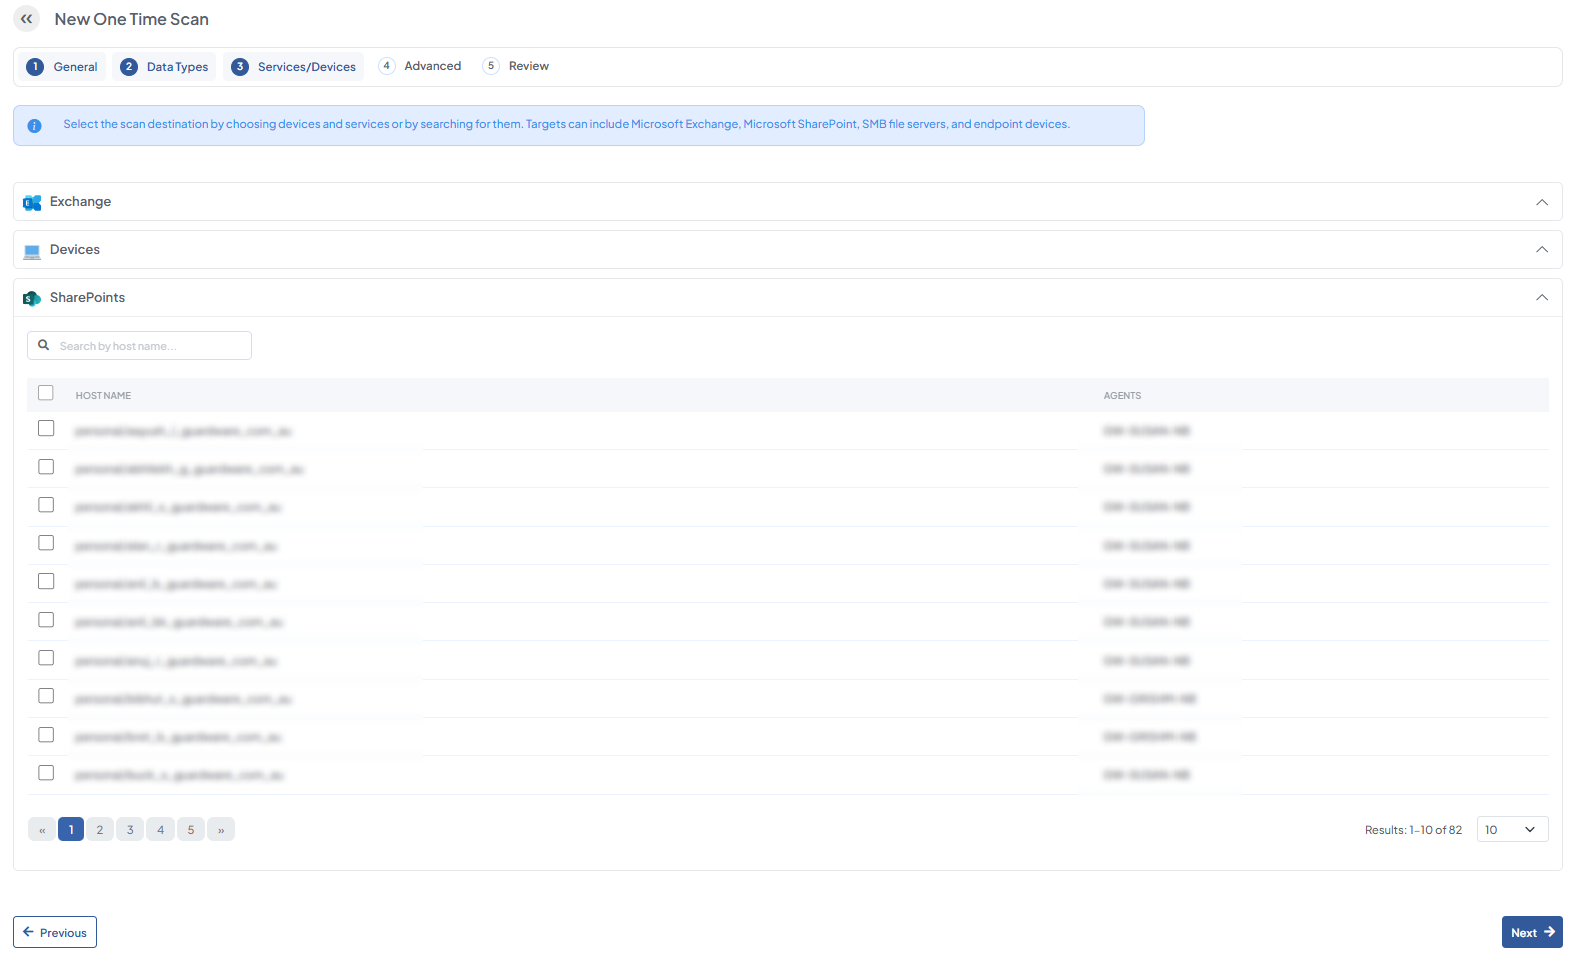
Select the targets and services to scan, then click Next.
-
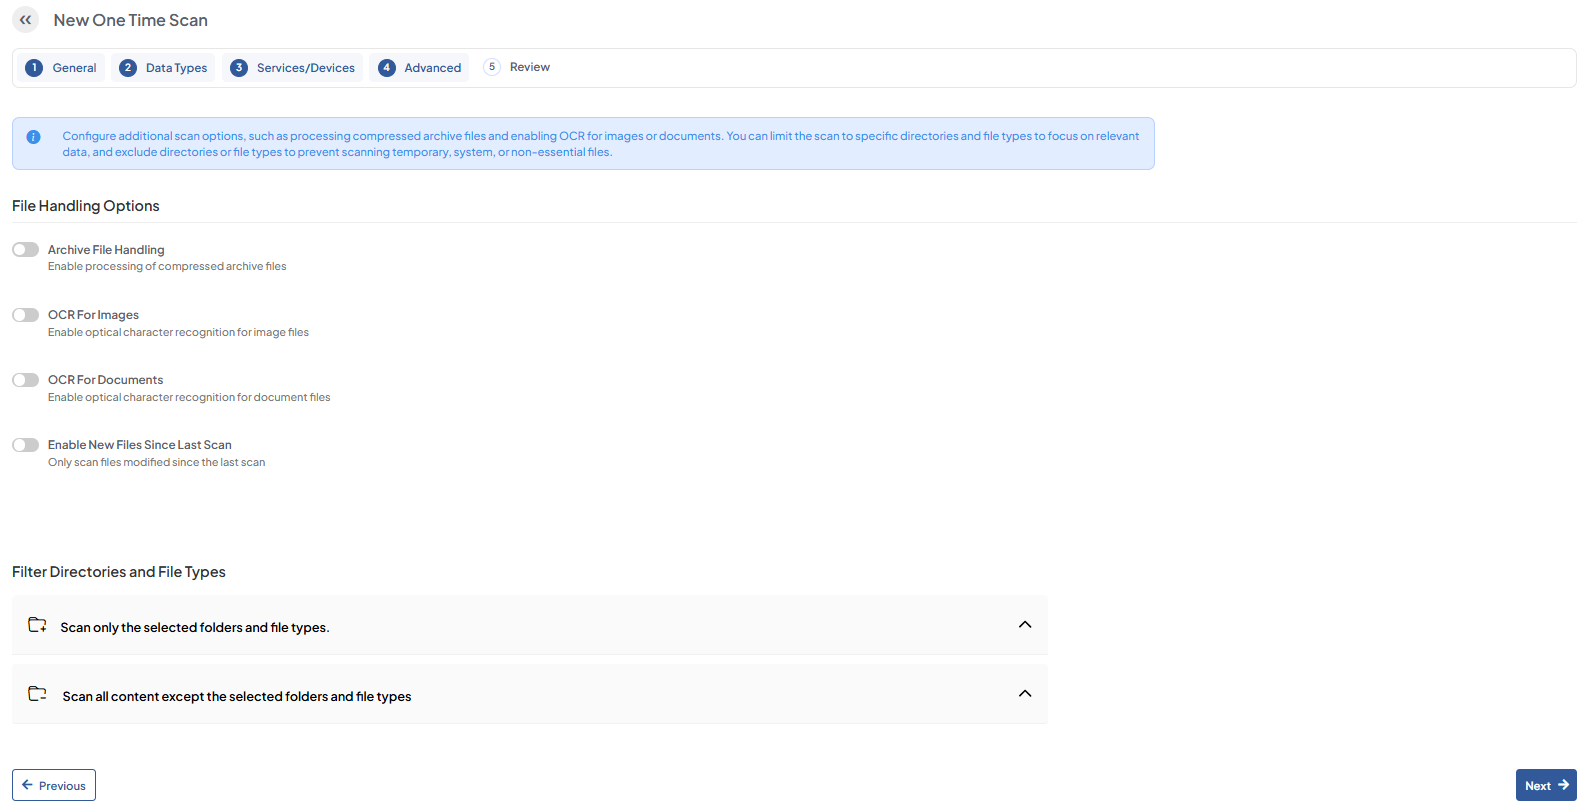
Configure the File Handling Options, specify the files and folders you want to include or exclude from the scan, and then click Next.
-
Review the scan configurations and click Save Scan. The scan will begin automatically.
Configure and Run an Ongoing Scan
An Ongoing Scan performs a full scan of selected targets and services on a recurring schedule. Use it for routine checks, to validate compliance with data-handling policies, and to maintain continuous visibility into sensitive information across your environment.
Each scan contributes to a historical record that DISCOVER uses to generate trends, allowing you to monitor changes over time, identify emerging risks, and track remediations. Ongoing Scans are resource-intensive, so schedule them during off-peak hours to minimize impact on business operations.
-
Go to DISCOVER > Scans and click +New Scan.
-
Select Ongoing Scan and click Proceed.
-
Select data types you want to search for and click Next.
-
Select the Targets/Services to scan, then click Next.
-
Configure File Handling Options and filters, then click Next.
-
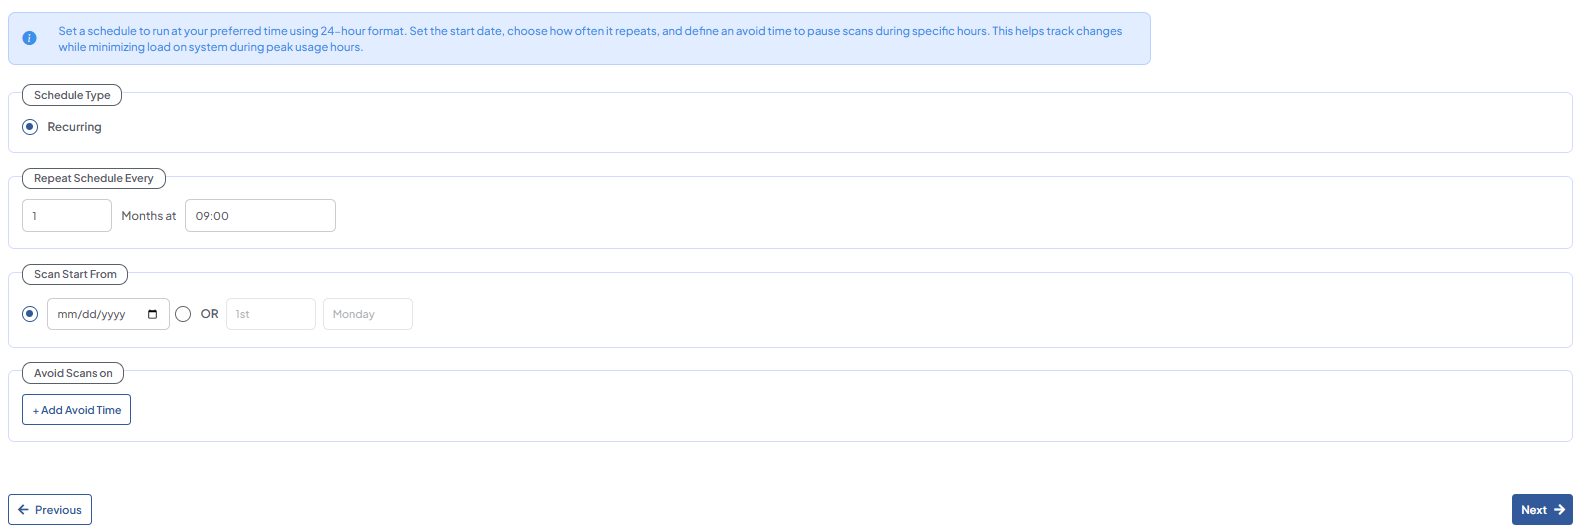
Schedule the scan time and click Next.
-
Review the scan configurations and click Save Scan. The scan will automatically initiate.
7. Next Steps
After configuring scans, use the Investigate section to review flagged results and assess risks, and the Remediate section to act on sensitive files. Continue refining your classifications and data types over time to improve accuracy and reduce false positives.